Deployment Guide
The development environment is great for getting your integrations up and running locally, but at some point you will need to get them running in production.
Environments
Here's a quick rundown of the differences between the two environments available for each project.
Development environment
- Very fast to deploy using the dev server
- Runs operations locally on your machine
- Can only run one operation at a time
- Only works when your machine is connected to the network
Production environment
- Somewhat slower to deploy
- Runs operations in the cloud (specifically on an AWS Lambda)
- Can run many operations simultaneously
- Works at all times
Deploy from the command line
The simplest way to deploy to production is with the command-line interface.
npm run deployDeploy from a GitHub action
A much better approach is to have GitHub or another CI product run the deploy after a successful merge to main. Here's an example using GitHub, but feel free to adapt to any other system you use.
Create the script
Create a file called <your project root>/.github/workflows/pipeline.yml and copy the following into it:
name: Pipeline

on: [push]

jobs:
  deploy:
    if: github.ref == 'refs/heads/main'
    name: Deploy
    runs-on: ubuntu-latest
    env:
      LIGHTYEAR_API_KEY: ${{ secrets.LIGHTYEAR_API_KEY }}
    steps:
      - uses: actions/checkout@v3
      - uses: actions/setup-node@v3
        with:
          node-version: 16
      - run: npm install
      - run: npm run deploy
Store the API Key as a secret
If you look in pipeline.yml, you can see that we are relying on a secret in this action.
name: Pipeline
on: [push]
jobs:
deploy:
if: github.ref == 'refs/heads/main'
name: Deploy
runs-on: ubuntu-latest
env:
LIGHTYEAR_API_KEY: ${{ secrets.LIGHTYEAR_API_KEY }}
steps:
- uses: actions/checkout@v3
- uses: actions/setup-node@v3
with:
node-version: 16
- run: npm install
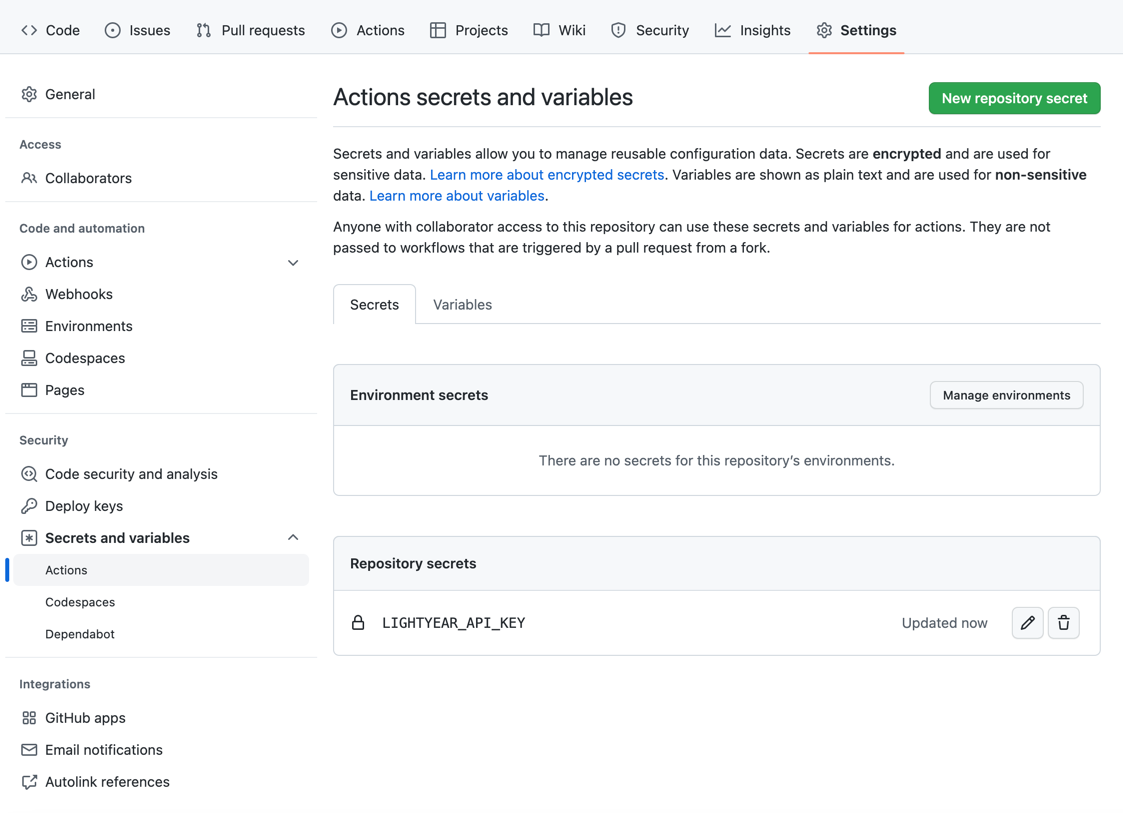
- run: npm run deployYou can get the correct value for this by viewing the .env file in your project directory. It should look something like:
LIGHTYEAR_API_KEY=●●●●●●●●●●●●●●●●●●●●●●●●●●●●●●●●●●●●We need to store this as an Actions Secret on the new repo. Go to Settings > Secrets and variables > Actions and use the New repository secret button to create the secret.

If you look back in pipeline.yml, you can see that the next time you push to the main branch, this GitHub Action will execute.
name: Pipeline

on: [push]

jobs:
  deploy:
    if: github.ref == 'refs/heads/main'
    name: Deploy
    runs-on: ubuntu-latest
    env:
      LIGHTYEAR_API_KEY: ${{ secrets.LIGHTYEAR_API_KEY }}
    steps:
      - uses: actions/checkout@v3
      - uses: actions/setup-node@v3
        with:
          node-version: 16
      - run: npm install
- run: npm run deployIf your default branch isn't main (for example, if it is set to master),
make sure to update line 7 to reflect this.
Commit and push to deploy
Now you are ready to commit and push the changes to your repo the way you normally do. For example:
git add --all
git commit -m "First commit"
git push origin main
Once you've done this, switch to production and you should see a deploy kick off.
Next Steps
Congratulations, you have set up continuous deployment for your integration project!
To take it to the next level, stay tuned for a guide on how to send notifications to Slack when your deploy completes.